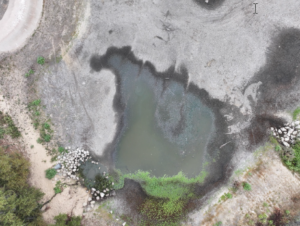
A good practice location should:
- Be free of people, animals, and obstacles like trees or power lines.
- Have a flat surface for takeoff and landing.
- Be in Class G airspace or an area where drone flight is permitted.
- Have minimal signal interference (avoid dense urban areas with heavy Wi-Fi or radio interference).
Setting Up Your Drone
Before your first flight, read the instructions that came with your drone and follow them carefully. Proper setup ensures safe operation and prevents potential issues. This includes charging the batteries, updating firmware, calibrating the compass, and ensuring the controller is properly synced with the drone. Make sure your drone is fully charged and updated to the latest software before heading out.
Your First Flight Drill: A Simple Hands-On Routine
A great self-led practice flight helps new operators develop control and awareness.
Here’s a structured first flight drill:
1. Preflight Check: Verify battery levels, GPS connection, and surroundings for
obstacles. Ensure that you have a safe takeoff and landing area, free of obstructions and people. Confirm that your return-to-home altitude is set properly in case of signal loss.
2. Basic Hover & Orientation: Take off to 10 feet, hover, and rotate the drone slowly 360° to get used to orientation. Practice yawing left and right while keeping the drone in position. This will help you develop better control and spatial awareness.
3. Box Pattern Flight: Fly the drone in a square pattern at a slow and controlled pace. Use smooth stick inputs to maintain an even trajectory. Fly forward for 10-15 feet, then stop and rotate 90 degrees before continuing to complete the square. Repeat this drill at different speeds to improve precision.
4. Altitude Adjustments: Practice ascending and descending smoothly to gain
confidence with vertical control. Try flying up to 50 feet, pausing at intervals to maintain control, and then descending slowly. Avoid quick throttle movements to prevent unstable flight.
5. Return to Home (RTH) Test: Initiate an RTH command to see how the drone responds, ensuring it lands safely. Observe how accurately the drone returns to its takeoff point and be ready to take manual control if necessary. Always perform this test in an open area to avoid obstacles during descent.
Next Steps & Resources
DroneInspectIR is launching soon! This course will be the perfect next step for those pilots who have already completed our pre-requisite Part 107 Test Prep Course or are already Part 107 certified.
Once comfortable, pilots should move on to camera controls, slow maneuvering near structures, and capturing thermal images.
For those looking for structured training, DroneInspectIR will soon provide real-world exercises tailored for infrared professionals who are integrating drone technology into their service options.
Visit ClarityAero.com for more information. Or, contact Jay directly: jay@clarityaero.com.
